Bandaging an Arm – your step-by-step guide
Click on each image with a “play icon” to access the video. Steps 2 and 9 are images only.
1. Preparing your bandages
In this video, you will learn what products are required to bandage an arm.
(1:37 mins)

2. Cutting stockinette
You will need to cut a piece of stockinette about one an a half times the length of the arm. Allow at least 3-5cm overhang at the top of the arm. The length needs to come to the first knuckle of the index finger. Carefully cut a small slit for the thumb. Pull the stockinette back off the hand in preparation for finger bandaging.
3. Applying finger bandages
Before you begin, you will need 2 x 2.5cm gauze bandages.
(4:35 mins)
4. Applying the undercast padding (fluffy)
Before you begin, you will need 2 to 3 rolls of undercast padding, start with a 5cm for the hand and moving up the arm you may need a 7.5cm and a 10cm.
(2:15 mins)
5. Applying the first bandage
Before you begin you will need 1 x 6cm short stretch bandage.
(3:15 mins)
6. Checking capillary refill
Once you have applied the first layer of bandages, it is important to check capillary refill.
(1:12 mins)
7. Applying bandage layers 2 and 3
Before you begin, you will need 2 or 3 bandages. Choose from sizes 8cm or 10cm.
(1:47 mins)
8. Applying the fourth and final layer of bandaging
Before you begin, you will need 1 x 10cm bandage.
(59 secs)

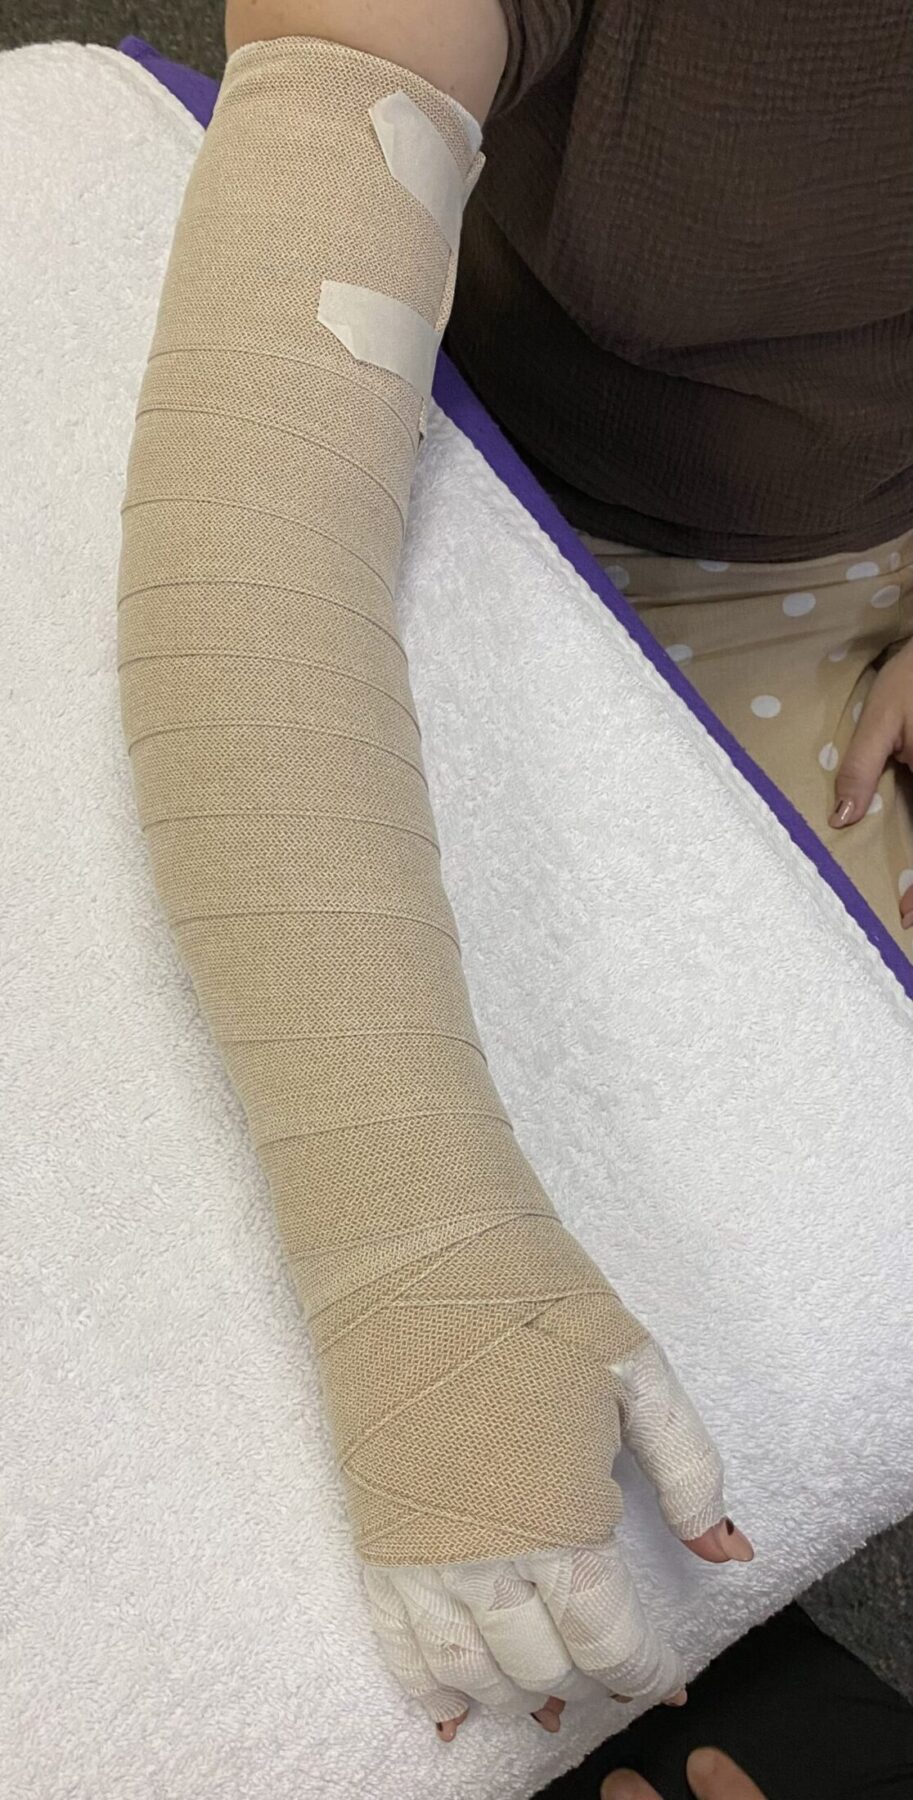
9 The finished product!
Your bandaged arm should look similar to this.
(5 secs)
